Unlocking Professional Design: A Guide to the Liquid Text Effect Bundle in 4 Variation
In the fast-paced world of digital design, the difference between a project that looks amateurish and one that commands attention often comes down to texture and depth. This is where the Liquid Text Effect Bundle in 4 Variation becomes an invaluable asset for creators ranging from seasoned graphic designers to small business owners managing their own marketing. This resource offers a streamlined way to apply high-quality, 3D typography styles to your text, artwork, or logos without needing hours of manual rendering. However, simply downloading a powerful tool does not guarantee a professional result. Many users stumble not because the tool is flawed, but because they overlook critical details regarding file preparation, resolution expectations, and the specific workflow required to maximize efficiency.
Understanding the Core Value of Smart Object Workflows
At its heart, this bundle relies on Smart Objects, a feature in Adobe Photoshop that allows you to edit content non-destructively. The premise is simple: you replace the placeholder layer with your own text or vector logo, save the file, and the effect automatically updates. While this sounds straightforward, a common misunderstanding arises when users attempt to bypass the smart object structure. Some beginners try to paint directly onto the effect layers or rasterize the text prematurely. This is a significant error that destroys the editability of the file. Once you rasterize a smart object, you lose the ability to quickly swap out text or adjust the underlying shape, turning a flexible template into a static image that requires starting over if a client requests a change.
To avoid this, always locate the layer marked as the smart object, usually indicated by a small icon in the corner of the layer thumbnail. Double-click this icon to open the source file, make your changes there, and then save. This ensures that the complex lighting, shadows, and liquid distortions calculated by the bundle remain intact while your content updates seamlessly. Treating the smart object as a sacred container is the first step toward maintaining a well-organized workflow.
The Resolution Trap and Print Readiness
One of the most frequent pitfalls in using digital graphic resources involves resolution mismatches. The Liquid Text Effect Bundle in 4 Variation boasts a high resolution of 3000x2000 pixels at 300 DPI, which is ideal for print materials like flyers, posters, and t-shirt designs. However, users often make the mistake of scaling these files up significantly beyond their original dimensions to fit large-format banners or billboards. Stretching a 3000-pixel wide image to cover a ten-foot wall will result in pixelation and a loss of the crisp, liquid detail that makes the effect appealing.
Before committing to a design path, check the intended output size. If you are creating website elements, Facebook covers, or YouTube thumbnails, the provided resolution is more than sufficient. For larger physical prints, consider designing at the final scale or using the bundle as a high-resolution texture element within a larger vector-based composition. Understanding the limits of raster graphics prevents the disappointment of seeing a beautiful design turn blurry upon printing.
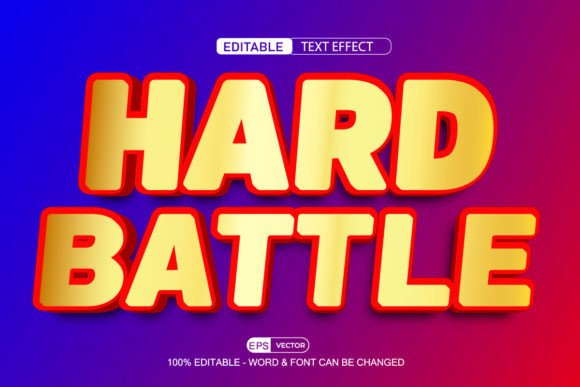
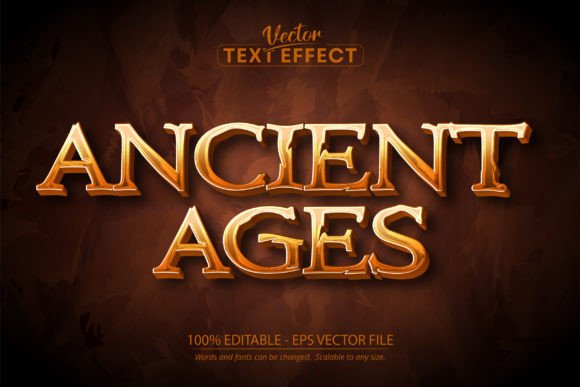
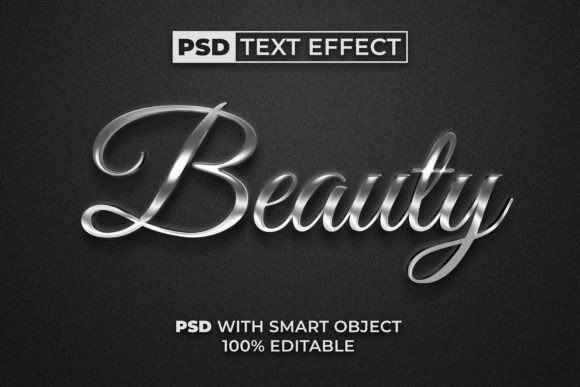
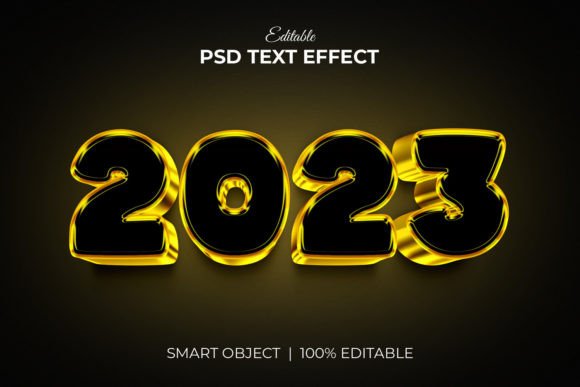
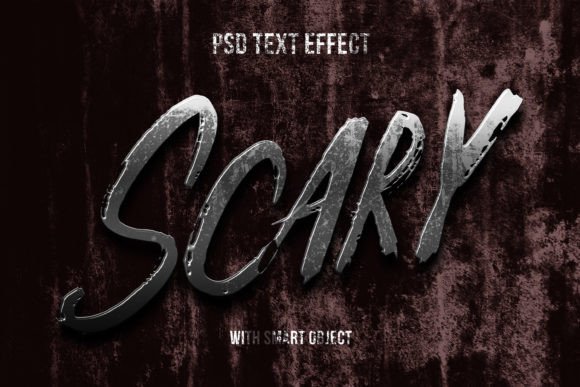
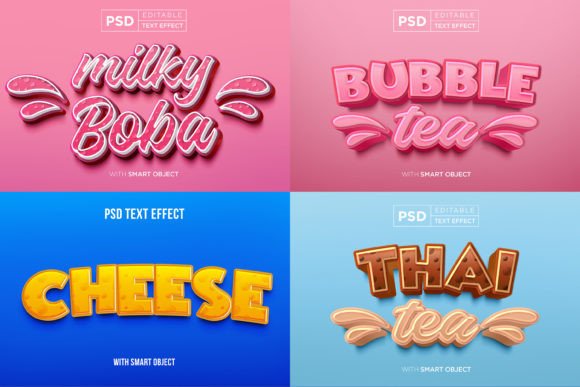
Navigating the Four Variations for Maximum Impact
This bundle includes four distinct variations of the liquid effect. A subtle but costly mistake many creators make is selecting a variation based solely on the preview image without considering the context of their brand or message. Each variation likely offers different color palettes, viscosity levels, or lighting angles. Using a dark, moody liquid style for a cheerful children's greeting card, or a bright, neon fluid for a corporate law firm's logo presentation, can create a dissonance that confuses the audience.
Take the time to test all four variations with your actual content. Because the editing process is quick, there is no excuse for settling on the first option you see. Toggle through the different smart object sets to see how the light interacts with your specific letterforms. Sometimes, a simpler variation allows the text to remain more legible, which is crucial for movie titles or promotional banners where readability drives engagement. The goal is to enhance communication, not obscure it with excessive stylistic flair.
Optimizing Layers for Complex Projects
The promise of "well-organized layers" is a major selling point, yet it is often underutilized. When working on complex projects like clothing designs or illustrations, users sometimes flatten their entire document too early in the process to reduce file size. While this saves space, it eliminates the ability to make fine-tuned adjustments to specific elements of the liquid effect, such as opacity, blending modes, or color balance. If a client asks for a slightly bluer tint or a softer shadow, a flattened file forces you to revert to the original PSD and start the export process again.
Keep the layers grouped and labeled as provided in the Liquid Text Effect Bundle in 4 Variation. Use adjustment layers clipped to the effect groups to modify colors without altering the base texture. This approach preserves the integrity of the 100% editable nature of the file. It also makes collaborating with other designers much smoother, as they can instantly understand the structure of your work without having to decipher a messy layer stack.
Realistic Expectations for Vector Logos and Shapes
While the bundle supports vector logos and shapes, it is important to remember that the final output is a rasterized effect. Some users expect that because they input a vector logo, the resulting liquid text will remain infinitely scalable. This is not the case. The smart object converts your vector input into a raster image to apply the pixel-based liquid textures. If you need the final result to be a pure vector for vinyl cutting or large-scale signage, this tool serves best as a visual mockup or a texture map rather than the final production file.
For the best results, ensure your vector logo has clean paths and sufficient contrast before placing it into the smart object. Intricate details in a logo might get lost in the fluid distortion of the effect. Simplifying the input shape often yields a stronger, more recognizable output. Test your logo at various sizes within the template to ensure that the "liquid" distortion enhances the brand identity rather than muddling the recognizable features of the mark.
Making the Right Choice for Your Project
Ultimately, the value of this graphic resource lies in its ability to speed up your workflow while delivering a polished, 3D aesthetic. Whether you are designing a Twitter cover, a placard for an event, or a cartoon title sequence, the key to success is respecting the tool's architecture. Avoid the temptation to cut corners by ignoring smart objects, stretching resolutions, or flattening layers prematurely. By approaching the Liquid Text Effect Bundle in 4 Variation with a mindset focused on preservation and adaptability, you ensure that your final designs are not only visually striking but also technically sound and ready for any medium.
Remember, great design is often about making the right technical choices behind the scenes so that the final viewer sees nothing but magic. With careful attention to these details, you can transform simple text into captivating art that elevates your brand and engages your audience effectively.